Why We Use Containers: Build Once, Run Anywhere
Say goodbye to those nasty "it works on my machine" problems! Containers run the same anywhere -- in the public cloud, private cloud, or even on your laptop.

You just checked in a killer feature that all your customers will love.
Once this Jenkins build finishes, you’ll be able to show the whole team. James will finally give you the respect you deserve.
Except the deployment to QA fails.
You forgot that you upgraded your version of java. You changed three, maybe four, server properties in DEV. And you wrote it all on a scratchpad...that’s at home.
So you burn hours with an annoyed Ops team to fix the higher environments. And when your company moves to AWS next month, you’ll do the same thing again.
Isn't there a better way?
It Works on My Any Machine
Containers run the same anywhere -- in the public cloud, private cloud, or even on your laptop. Each container packages an application and all the dependencies needed to run it.

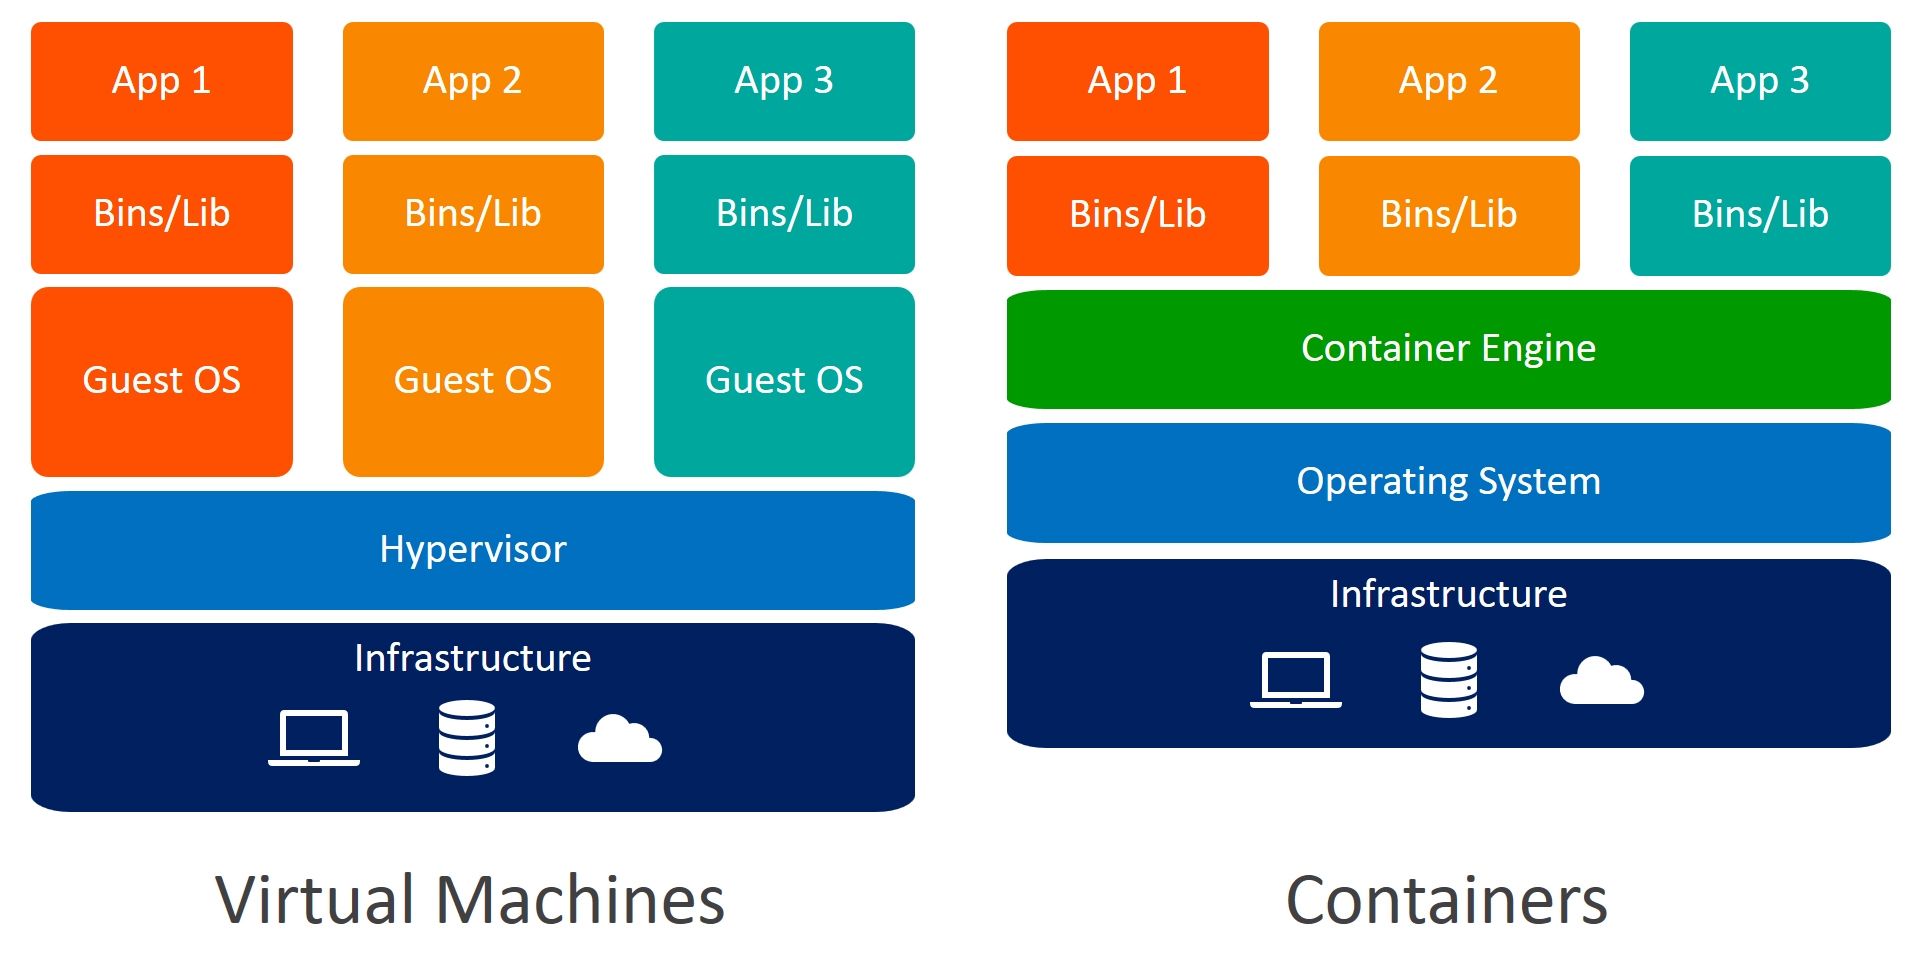
And since they share the OS kernel, containers are a fraction of a VM’s size. This makes it easy to build, scale and recover quickly.
Create a Docker Container
I’ll take one of my previous tutorials & turn it into a container. The container image we create here will run the same in the public cloud, your local data center, and your laptop.
What You’ll Need
- Some basic knowledge of maven
- Docker Desktop installation ( https://www.docker.com/get-started)
- DockerHub account (https://www.docker.com/get-started)
Create a container image
Step 1: Download and extract the project we’ll use
- This is a simple web app that runs a basic process
Step 2: In the directory you downloaded, create a file called 'Dockerfile'
- The Dockerfile is a list of instructions for how to build a container image. It’s like a “recipe” for making containers.
Step 3: Create the image from a parent image. Add this line to your Dockerfile:
FROM tolarewaju3/eap7-full- FROM specifies a parent image, or a starting point for your container. This parent image runs EAP in full mode on port 8080. The docker file is here.
- When we build our image, it will automatically pull my image from docker hub
Step 4: Set the working directory. Add this line:
WORKDIR /opt/jboss- The working directory is where all future commands will run in
Step 5: Copy our process artifact and web application. Add these lines:
COPY simple-process/target/*.jar .
COPY embedded-process-workitemhandler/target/*.war .- COPY puts the resources inside our container image for use
Step 6: Install the artifact into the maven repository. Add this line:
RUN mvn install:install-file \ -Dfile=simple-process-0.0.1-SNAPSHOT.jar \ -DgroupId=org.codelikethewind \ -DartifactId=simple-process \ -Dversion=0.0.1-SNAPSHOT \ -Dpackaging=jar \ -DgeneratePom=true- The ‘RUN’ command executes commands in the working dir
- The web app loads processes from maven. Before we can run it, we need to install our process into the local maven repo
Step 7: Deploy the web app on JBoss EAP. Add this line:
RUN cp *.war /opt/jboss/jboss-eap-7.3/standalone/deployments- To deploy our app, we’ll copy the web app to the deployments folder
Step 8: Build your container image
docker build -t <your_docker_username>/simple-workitem-handler .-t: specifies a tag for our image
Run the docker container
Step 1: Open a terminal
Step 2: Run your new docker image
docker run -p 8080:8080 <your_docker_username>/simple-workitem-handler-p: bind the docker container port 8080 to port 8080 on our host system
Step 3: Go to http://localhost:8080/embedded-process-workitemhandler/
Best Practices
Despite some similarities, containers are not “tiny VMs”. Each container should mirror the lifecycle of a single application. So only one application should be packaged inside a single container.
For some other best practices, check out this doc.
Recap
Containers allow us to build software that runs that same on any machine. One way to create a container is to write a Dockerfile -- a “recipe” for container images. Then we can use docker (or another orchestrator) to run the container.
Project Code & Links
Happy Coding!
-T.O.